Difference between revisions of "240p test suite"
(→Sega Dreamcast) |
|||
| Line 93: | Line 93: | ||
== Sega Dreamcast == | == Sega Dreamcast == | ||
| − | The Sega Dreamcast version includes more options, but the core functionality for 240p is the same. No special hardware or modifications are needed, it will run on any MIL compatible Dreamcast after burning the CDI image (discjuggler format). It was coded using [http://sourceforge.net/projects/cadcdev/ KallistiOS] and some functionality from parallax (font support). | + | The Sega Dreamcast version includes more options, but the core functionality for 240p is the same. No special hardware or modifications are needed, it will run on any [http://en.wikipedia.org/wiki/MIL-CD MIL] compatible Dreamcast after burning the CDI image ([http://www.padus.com/ discjuggler] format). It was coded using [http://sourceforge.net/projects/cadcdev/ KallistiOS] and some functionality from parallax (font support). |
| − | This version has a menu option for changing the current resolution, with | + | This version has a menu option for changing the current resolution, with the following values: |
| − | * 240p: Standard 320x240 at 60hz is used, with all graphic data in that resolution. | + | * '''240p''': Standard 320x240 at 60hz is used, with all graphic data in that resolution. |
| − | * Fake 480i: This is 640x480i at 60hz, but using all the resources at 320x240 using internal line doubling. Useful for testing for this case which is present in many Dreamcast and PS2 games. Also known as "Fake hi-res" | + | * '''Fake 480i''': This is 640x480i at 60hz, but using all the resources at 320x240 using internal line doubling. Useful for testing for this case which is present in many Dreamcast and PS2 games. Also known as "Fake hi-res" |
| − | * 480i: It is 640x480i at 60hz as well, however graphics are unscaled and shown only on the upper left corner of the screen (the first 320x240 pixels). Since there is a 1 to 1 pixel ration as in 240p, tests can be performed for 480i de-interlacers and scalers. | + | * '''480i''': It is 640x480i at 60hz as well, however graphics are unscaled and shown only on the upper left corner of the screen (the first 320x240 pixels). Since there is a 1 to 1 pixel ration as in 240p, tests can be performed for 480i de-interlacers and scalers. |
| − | * 480p with scanlines: Only available when using a VGA Box. This is internally line-doubled and displayed. In the case of previous resolutions, they are also internally line doubled to 480p, but respecting each mode variations. | + | * '''480p with scanlines''': Only available when using a VGA Box. This is internally line-doubled and displayed. In the case of previous resolutions, they are also internally line doubled to 480p, but respecting each mode variations. |
The Dreamcast resolution is full 320x240 when in that mode and using the PVR version, there is a previous SDL version that runs on 320x234 mode, but the small framework was rewritten to use the Power VR (PVR) chip on the Dreamcast directly with a great advantage in speed for frame alternating patterns. However the SDL version is kept (bit no longer maintained) for documentation purposes along with its source code. | The Dreamcast resolution is full 320x240 when in that mode and using the PVR version, there is a previous SDL version that runs on 320x234 mode, but the small framework was rewritten to use the Power VR (PVR) chip on the Dreamcast directly with a great advantage in speed for frame alternating patterns. However the SDL version is kept (bit no longer maintained) for documentation purposes along with its source code. | ||
Revision as of 17:30, 14 February 2011
A homebrew software suite for video game consoles developed to help in the evaluation of upscalers, upscan converters and line doublers.
It has tests designed with the processing of 240p signals in mind, although when possible it includes other video modes and specific tests for them. These have been tested with video processors on real hardware and a variety of displays, including CRTs and Arcade monitors via RGB.
Contents
Tests and Patterns
Since the software is running on a gaming platform, there is some degree of interactivity not possible on regular video tests, we have tried to use this as best as possible when applicable. For the rest of the cases regular test patterns, with inspiration in other sources, have been used.
Here's a description of each of the options, as well as any specific commands within them.
Color Bars
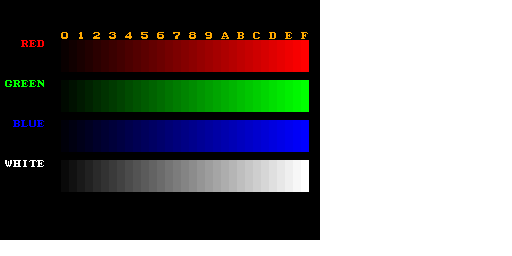
This is a typical pattern for adjusting blacks, whites and colors in general. Based on the CPS-2 color adjust pattern. Each bar has been set at a regular interval in hexadecimal, corresponding to colors 0x00 to 0xFF (0 to 255).
Genesis/MD Version
In the case of the Genesis, there is a big limitation when trying to display primary colors. While it can display 64 colors simultaneously (4 palettes of 15 colors + alpha each), the palette only has 8 pure tones of Red, Green and Blue. Because of this, the scale can only display 8 tones per color, including the white scale. Nevertheless, the real values are stored in VRAM and on each palette. The palette is adjusted to what the Genesis can display.
Dreamcast Version
The pattern is displayed with full accurate colors.
Color Bars with Gray Scale
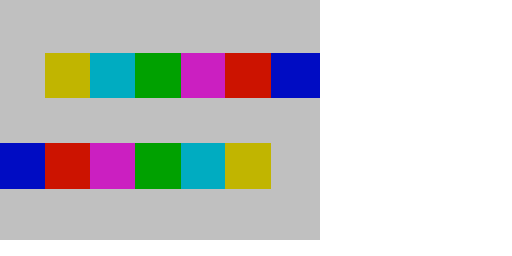
This pattern idea and layout borrows form the Digital Video Essentials color adjust pattern. It has a gray background as reference, and can be used with color filters in order to adjust color accuracy.
Grid
A grid which borrows its basic pattern from the CPS-2 grid. It is used to determine linearity on CRTs, but is presented here in order to align the screen and find out overscan on the display. It uses the full resolution of the target console, with a margin of red squares for the corners. The pattern should be shown fully.
Linearity
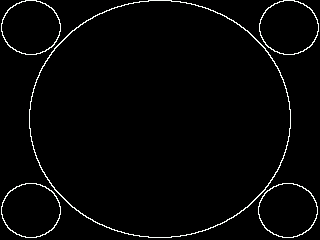
Five circles are displayed on top of a grid, one in each corner and a big one in the middle. Used on CRTs to check linearity of the display, in this case you can show or hide the grid with the "A" button, and toggle betwwen grids with the "b" button. It is interesting to see how the intensity of the light changes when turning off the grid on some flat panel displays.
Drop Shadow
This is a crucial test for 240p upscan converters. It displays a simple sprite shadow (32 by 32 pixels) against a background, but the shadow is shown only on each other frame. On a CRT this achieves a transparency effect, since you are watching a 30hz shadow on a 60hz signal. No background detail should be lost and the shadow should be visible.
This is a very revealing test since it exposes how the device is processing the signal. On devices that can't handle 240p signals, you can usually see that the signal is being interlaced with an odd and an even frame, as if it were regular 480i. This shows a shadow that doesn't flicker, with feathering (a line is drawn and the next one isn't).
You can toggle the frame used to draw the shadow with the c button on the Genesis or the Y button on the Dreamcast. Backgrounds can be switched with the A and B buttons.
Lag Test
This test is still being developed. The main intention is to show a changing pattern on the screen, and given a visual and repetitive cue, play a beep. This should show to some degree the lag (if present) when processing the signal.
As an added feature, the user can click the A button when the sprite is aligned with the one on the background, and the offset in frames form the actual intersection will be shown on screen. This can be repeated ten times and the software will calculate the average. Whenever the button was pressed before the actual intersection frame, the result will be ignored (but still shown onscreen).
The B button can be used to change the direction of the sprite from vertical to horizontal, or display both at the same time.
The C button on the Genesis and the X button on the Dreamcast can be used to turn off the audio cue. In the case of the Dreamcast, if a Purupuru (Jump pack) is found, it will be used as well.
Horizontal Stripes
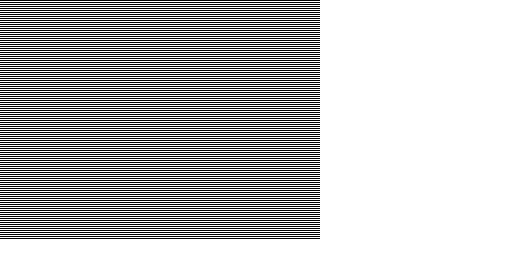
A pattern consisting of a full screen of horizontal black and white stripes, one pixel tall each. This is a taxing pattern, specially when pressing the A button which enables alternating each frame the color of the lines. A good 240p video processor should show all frames. On several displays we've observed that the screen stays static on the first pattern displayed on screen and no change is shown. For this a Frame counter is present, which can be enabled with the C button on Genesis or the X button on Dreamcast.
The user can also change the frames with the B button, which alternates the even and odd frame cadence for the automatic switching of patterns.
When using the 480i resolution on the Dreamcast version, this pattern makes evident the way the upscaler is processing the signal as well.
Checkerboard
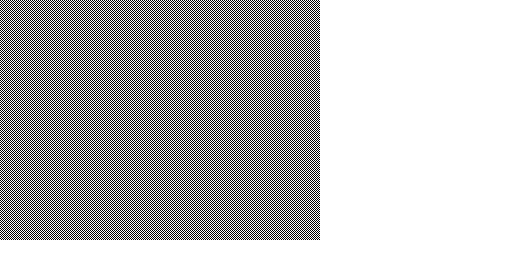
An even more taxing pattern, a one pixel black and one pixel white alternating pattern. Exactly the same commands apply as with the Horizontal Stripes.
This pattern also makes obvious if all lines are being scaled equally, if some appear thicker than other the scaler or display is not displaying them equally.
Versions
There are currently two platforms that run the suite, both have been developed and tested on real hardware, The software should run in NTSC mode by default (hasn't been tested in PAL hardware, but should work as expected).
Sega Genesis/ Mega Drive
The Sega Genesis version was developed using the SGDK, it was the first version of the 240p Test Suite and is fully coded in C. In order to run it, we recommend the Tototek Flashcart or the newer Everdrive.
The Genesis resolution is 320x224 and is being used fully, in NTSC (60hz).
Sega Dreamcast
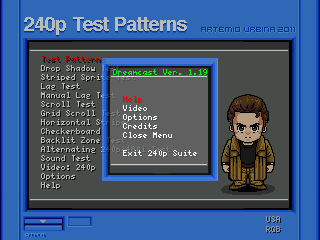
The Sega Dreamcast version includes more options, but the core functionality for 240p is the same. No special hardware or modifications are needed, it will run on any MIL compatible Dreamcast after burning the CDI image (discjuggler format). It was coded using KallistiOS and some functionality from parallax (font support).
This version has a menu option for changing the current resolution, with the following values:
- 240p: Standard 320x240 at 60hz is used, with all graphic data in that resolution.
- Fake 480i: This is 640x480i at 60hz, but using all the resources at 320x240 using internal line doubling. Useful for testing for this case which is present in many Dreamcast and PS2 games. Also known as "Fake hi-res"
- 480i: It is 640x480i at 60hz as well, however graphics are unscaled and shown only on the upper left corner of the screen (the first 320x240 pixels). Since there is a 1 to 1 pixel ration as in 240p, tests can be performed for 480i de-interlacers and scalers.
- 480p with scanlines: Only available when using a VGA Box. This is internally line-doubled and displayed. In the case of previous resolutions, they are also internally line doubled to 480p, but respecting each mode variations.
The Dreamcast resolution is full 320x240 when in that mode and using the PVR version, there is a previous SDL version that runs on 320x234 mode, but the small framework was rewritten to use the Power VR (PVR) chip on the Dreamcast directly with a great advantage in speed for frame alternating patterns. However the SDL version is kept (bit no longer maintained) for documentation purposes along with its source code.
On the Dreamcast PVR version the freeware Atari Classic TrueType Fonts are used.
XRGB-3 results
B0 Mode
B1 Mode
Source code
The source code will be released at the same time the binaries are, under the GPL. Homebrew and open source SDKs have been used on the platforms so far. The test pattern images used to generate the graphical data for the console versions will be included along with the source code.
Contributors
- Code: Artemio Urbina
- Main menu graphics: Asher
- SGDK SDK assistance: Stephane
- KallistiOS SDK assistance: BlueCrab
- Dreamcast toolchain built with: Buildcross
- Advisor: Tobias W. Reich
