Difference between revisions of "XRGB-2"
| Line 115: | Line 115: | ||
=== How to reset XRGB-2 === | === How to reset XRGB-2 === | ||
| − | When the unit is powered down, press all four buttons (up, down, left and right) and then power on the unit. All values | + | When the unit is powered down, press all four buttons (up, down, left and right) and then power on the unit. All values will be reset to factory defaults. |
| + | |||
| + | == Scanlines == | ||
| + | |||
| + | This unit has only one scanline setting, and is activated by turning on the last option in the menu, named V_LINE. | ||
| + | |||
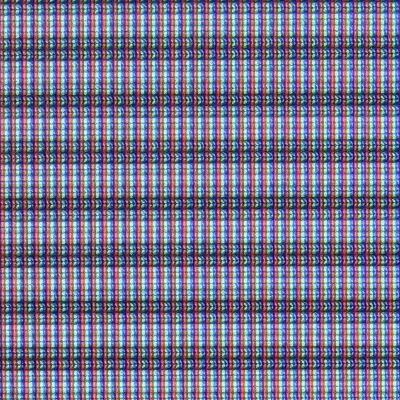
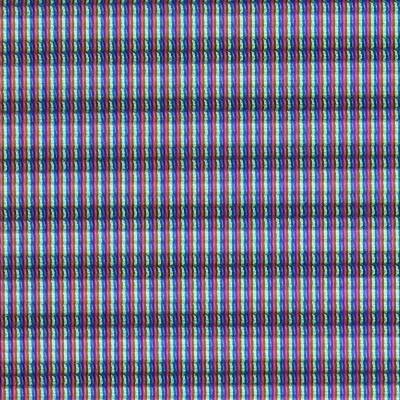
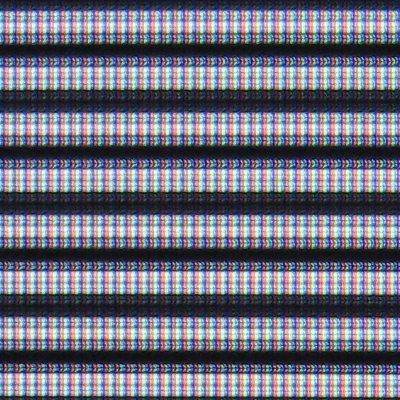
| + | In order to compare the scanlines to those of the [[XRGB-3]], several pictures were taken at different scanline levels. The results matched at level 127 of the XRGB-3. The same cables, arcade [[PCB]], camera settings and TV were used to connect and compare them. The images show a cropped section of pure white on the CRT calibration screen of a [[System 16]] board. | ||
| + | |||
| + | {| class="wikitable" border="1" | ||
| + | |- | ||
| + | |<!--column1-->[[Image:XRGB-2-Scanlines.jpg]] | ||
| + | |<!--column2-->[[Image:XRGB-3-Scanlines-127-cropped.jpg]] | ||
| + | |- | ||
| + | |<!--column1-->XRGB-2 with scanlines photo | ||
| + | |<!--column2-->XRGB-3 with scanlines at 127 | ||
| + | |}<!--end wikitable--> | ||
| + | |||
| + | {| class="wikitable" border="1" | ||
| + | |- | ||
| + | |<!--column1-->[[Image:XRGB-3-Scanlines-001-cropped.jpg]] | ||
| + | |- | ||
| + | |<!--column1-->XRGB-3 with scanlines at 001 for as reference | ||
| + | |}<!--end wikitable--> | ||
Revision as of 06:45, 14 January 2010
The XRGB-2 is an upscan converter by Micomsoft. It has limited capabilities when compared to the newer units such as the XRGB-2 plus and the XRGB-3, nevertheless it offers great performance. The stability of the image is rock solid, and you usually don't need to fiddle with settings as much as with later units.
It offers no remote control, and all functiosn are available through five buttons on the unit's front.
Contents
Menu
| Japanese | English | Setting | Default setting | Use |
|---|---|---|---|---|
| 明るさ | Brightness | 0 - 62 | 41 | Adjust Brightness |
| BLUE | 0 - 62 | 31 | Adjust blue | |
| GREEN | 0 - 62 | 31 | Adjust green | |
| H_POS | 0 - 7 | 4 | Adjust horizontal position | |
| BLACK | 0 - 62 | 0 | Adjust black level | |
| GAMMA | OFF 1 2 3 4 | OFF | Adjust gamma | |
| USE_CH | S+VIDEO S VIDEO | S+VIDEO | ||
| V_SYNC | AUTO 50HZ 60HZ | AUTO | ||
| AFC | 0 - 8 | 0 | ||
| DTC_TYP | NTSC PS USER | NTSC | ||
| USR_DTC | 1 - 62 | 59 | ||
| V_LINE | OFF ON | OFF | Scanlines |
Specifications
Inputs
It also has passthrough for:
- VGA
- RCA Audio
- Mini Jack
Outputs
- VGA at 640x480 31khz
- RGB in 15-pin D-sub (for older Japanese monitors)
- Mini Jack for audio output
FAQ
What is the "RGB/PCB STD" switch for?
This little switch physically activate a set of 220 ohm resistors, allowing the use of arcade game pcbs on your display device.
How to reset XRGB-2
When the unit is powered down, press all four buttons (up, down, left and right) and then power on the unit. All values will be reset to factory defaults.
Scanlines
This unit has only one scanline setting, and is activated by turning on the last option in the menu, named V_LINE.
In order to compare the scanlines to those of the XRGB-3, several pictures were taken at different scanline levels. The results matched at level 127 of the XRGB-3. The same cables, arcade PCB, camera settings and TV were used to connect and compare them. The images show a cropped section of pure white on the CRT calibration screen of a System 16 board.

|

|
| XRGB-2 with scanlines photo | XRGB-3 with scanlines at 127 |

|
| XRGB-3 with scanlines at 001 for as reference |