Difference between revisions of "XRGB-2"
(→Outputs) |
(→Capacitor List) |
||
| Line 109: | Line 109: | ||
=== Capacitor List === | === Capacitor List === | ||
| + | |||
| + | {| class="wikitable" style="text-align:left; width:20%;" | ||
| + | |- | ||
| + | ! scope=col | Ver 1.21 PCB | ||
| + | |- | ||
| + | |SMD:<br> | ||
| + | C158 2200uF/25V<br> | ||
| + | C21 470uF/10V<br> | ||
| + | C134 470uF/10V<br> | ||
| + | C27 470uF/10V<br> | ||
| + | C98 470uF/10V<br> | ||
| + | C45 470uF/10V<br> | ||
| + | C3 470uF/10V<br> | ||
| + | C12 470uF/10V<br> | ||
| + | C30 100uF/16V<br> | ||
| + | C153 100uF/16V<br> | ||
| + | C157 100uF/16V<br> | ||
| + | C73 100uF/16V<br> | ||
| + | C70 100uF/16V<br> | ||
| + | C167 100uF/16V<br> | ||
| + | C118 100uF/16V<br> | ||
| + | C156 47uF/16V<br> | ||
| + | C154 47uF/16V<br> | ||
| + | C63 47uF/16V<br> | ||
| + | C125 47uF/16V<br> | ||
| + | C83 47uF/16V<br> | ||
| + | C155 47uF/16V<br> | ||
| + | C128 47uF/16V<br> | ||
| + | C147 47uF/16V<br> | ||
| + | C13 47uF/16V<br> | ||
| + | C116 47uF/16V<br> | ||
| + | C81 47uF/16V<br> | ||
| + | C132 10uF/50V<br> | ||
| + | C38 10uF/50V<br> | ||
| + | C64 10uF/50V<br> | ||
| + | C57 10uF/50V<br> | ||
| + | C150 10uF/50V<br> | ||
| + | C68 10uF/50V<br> | ||
| + | C67 10uF/50V<br> | ||
| + | C25 10uF/50V<br> | ||
| + | C50 10uF/50V<br> | ||
| + | C99 10uF/50V<br> | ||
| + | C23 10uF/50V<br> | ||
| + | C7 10uF/50V<br> | ||
| + | C24 10uF/50V<br> | ||
| + | C29 10uF/50V<br> | ||
| + | C32 10uF/50V<br> | ||
| + | C82 10uF/50V<br> | ||
| + | C44 22uF/25V<br> | ||
| + | C2 22uF/25V<br> | ||
| + | C8 22uF/25V<br> | ||
| + | C36 10uF/16V<br> | ||
| + | C62 0.47uF/50V<br> | ||
| + | C17 0.47uF/50V<br> | ||
| + | C54 0.47uF/50V<br> | ||
| + | C55 4.7uF/50V<br> | ||
| + | C53 2.2uF/50V<br> | ||
| + | 51pcs | ||
| + | |} | ||
== FAQ == | == FAQ == | ||
Revision as of 15:27, 10 August 2018
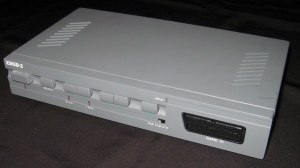
The XRGB-2 is an upscan converter by Micomsoft. It has limited capabilities when compared to the newer units such as the XRGB-2 plus and the XRGB-3, nevertheless it offers great performance. The stability of the image is rock solid, and you usually don't need to fiddle with settings as much as with later units.
It offers no remote control, and all functions are available through five buttons on the unit's front. It offers just one scanline setting, equivalent to the 127 setting (50%) on the XRB-3.
Contents
Menu
| Japanese | English | Setting | Default setting | Use |
|---|---|---|---|---|
| 明るさ | Brightness | 0 - 62 | 41 | Adjust white level |
| BLUE | 0 - 62 | 31 | Adjust blue | |
| GREEN | 0 - 62 | 31 | Adjust green | |
| H_POS | 0 - 7 | 4 | Adjust horizontal position | |
| BLACK | 0 - 62 | 0 | Adjust black level | |
| GAMMA | OFF / 1 / 2 / 3 / 4 | OFF | Adjust gamma | |
| USE_CH | S+VIDEO / S VIDEO | S+VIDEO | ||
| V_SYNC | AUTO / 50HZ / 60HZ | AUTO | ||
| AFC | 0 - 8 | 0 | ||
| DTC_TYP | NTSC / PS / USER | NTSC | ||
| USR_DTC | 1 - 62 | 59 | ||
| V_LINE | OFF / ON | OFF | Scanlines |
Specifications
Inputs
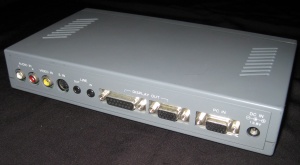
It also has passthrough for:
- VGA
- RCA Audio
- Mini Jack
Outputs
- VGA at 640x480 31khz
- RGB in 15-pin D-sub (for older Japanese monitors)
- Mini Jack for audio output
Capacitor List
| Ver 1.21 PCB |
|---|
| SMD: C158 2200uF/25V |
FAQ
What is the "RGB/PCB STD" switch for?
This little switch physically activates a set of 220 ohm resistors, allowing the use of arcade game pcbs on your display device. This is needed since the video level used by PCBs is higher than the one used by game consoles, the resistors make them equivalent.
How to reset XRGB-2
When the unit is powered down, press all four buttons (up, down, left and right) and then power on the unit. All values will be reset to factory defaults.
Important : about GAME IN input (RGB-21)
Never directly use the European standard SCART cables with an XRGB-2 since the pinout is different to the Japanese standard RGB-21 ones, and damage might result due to voltage applied on signal lines.
Power Supply
Power supplies tend to fail. It requires 12V 0.5 Amp, center positive. Less than 12 and more than 11 tends to give a wobbly image, and less than 10V turns on the LED without output.
Scanlines
This unit has only one scanline setting, and is activated by turning on the last option in the menu, named V_LINE.
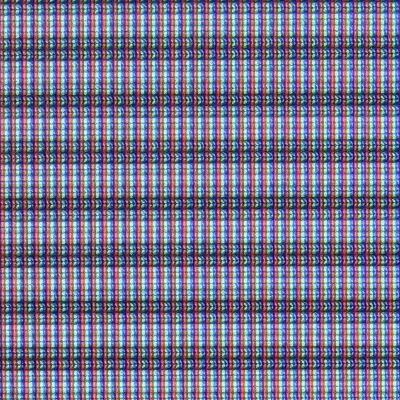
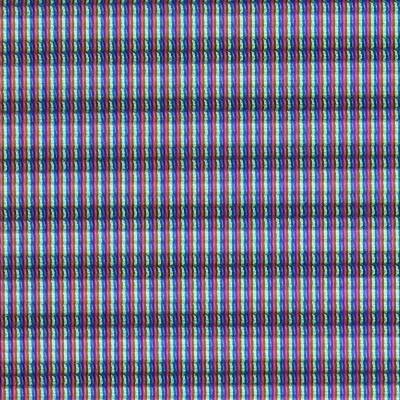
In order to compare the scanlines to those of the XRGB-3, several pictures were taken at different scanline levels. The results matched at level 127 of the XRGB-3. The same cables, arcade PCB, camera settings and TV were used to connect and compare them. The images show a cropped section of pure white on the CRT calibration screen of a System 16 board.

|

|
| XRGB-2 with scanlines photo | XRGB-3 with scanlines at 127 |

|
| XRGB-3 with scanlines at 001 for reference |

