Difference between revisions of "240p test suite"
(→Source code: I was under the impression that SF mirror was lagging GitHub lately) |
(→Downloads: NES, GB, and GBA releases go through GH not SF) |
||
| Line 478: | Line 478: | ||
In the case of the CD systems all you need is a CD-R and the console, for the cart version you need a flash cart, | In the case of the CD systems all you need is a CD-R and the console, for the cart version you need a flash cart, | ||
| − | Current release is 1.14 on the Genesis/Sega CD, 1.00 on the PC Engine, 1.01 on SNES, 1.20 on Dreamcast and 1.8 on Wii/GC (version numbers are platform specific and have the same relative features) available at the [https://sourceforge.net/projects/testsuite240p/files/?source=navbar 240p Test Suite | + | Current release is 1.14 on the Genesis/Sega CD, 1.00 on the PC Engine, 1.01 on SNES, 1.20 on Dreamcast and 1.8 on Wii/GC (version numbers are platform specific and have the same relative features) available at the [https://sourceforge.net/projects/testsuite240p/files/?source=navbar 240p Test Suite files] page on SourceForge. |
| + | |||
| + | NES, GB, and GBA have mostly synchronized versioning. The latest release is at [https://github.com/pinobatch/240p-test-mini/releases 240p Test Suite releases] on GitHub. | ||
''WARNING: Programmer graphics inside'' | ''WARNING: Programmer graphics inside'' | ||
Revision as of 16:41, 28 March 2021
A homebrew software suite for video game consoles developed to help in the evaluation of upscalers, upscan converters, line doublers and of course TV processing of 240p video. The Wii, Dreamcast and GameCube versions have modes for 480i, 288p, 576i and 480p evaluation as well.
It consists of tests designed with the processing of 240p signals in mind, although when possible it includes other video modes and specific tests for them. These have been tested with video processors on real hardware and a variety of displays, including CRTs, PVMs, BVMs and Arcade monitors via RGB.
As a secondary target, the suite aims to provide tools for calibrating colors, geometry, linearity, overscan and black & white levels, for specific console outputs and setups.
Current platforms are: Sega Genesis (Mega Drive), Sega CD (Mega CD), Sega Dreamcast, PC Engine/Turbografx-16, Super Nintendo/Super Famicom (SNES/SFC), NES, GameBoy, GameBoy Advance, Sony Playstation, Nintendo Wii and Nintendo GameCube.
MDFourier is also a part of the 240p Test Suite, it can compare audio signatures and generate a series of graphs that show how they differ. These can help to identify how audio signatures vary between systems, to detect if the audio signals are modified by audio equipment, to find if modifications resulted in audible changes, to help tune emulators, FPGA implementations or mods, etc. Check out the link for more information.
There is an excellent informative video made by "My Life in Gaming" from their RGB 300 video series. [1]
This software is open source and free, if you wish to contribute to this project, there is a patreon section at the bottom of the page.
Contents
- 1 Test Patterns and Interactive Tests
- 2 Versions
- 2.1 Sega Genesis/Mega Drive
- 2.2 Sega/Mega CD
- 2.3 PC Engine/Turbo Grafx-16
- 2.4 CD-ROM2/Super CDROM2 (PCE Duo/Turbo Duo)
- 2.5 Super Nintendo/Super Famicom
- 2.6 Sega Dreamcast
- 2.7 Nintendo Wii
- 2.8 Nintendo GameCube
- 2.9 NES/Famicom
- 2.10 Game Boy
- 2.11 Neo Geo MVS/AES and CD
- 2.12 Sega Master System
- 2.13 Playstation
- 2.14 Other versions
- 3 Source code
- 4 Downloads
- 5 Physical releases
- 6 Bug Reports, new features and suggestions
- 7 Contributors
- 8 Information on 240p video and scanlines
- 9 Recommended Scalers, Upscan converters and Video Processors
- 10 Versión en español
- 11 Patreon
Test Patterns and Interactive Tests
Since the software is running on a gaming platform, there is some degree of interactivity not possible on regular video tests, we have tried to use this as best as possible when applicable. For the rest of the cases regular test patterns, with inspiration in other sources, have been used.
Here's a description of each one of the options, as well as any specific commands within them.
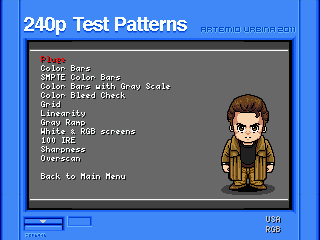
Test Patterns
These are found under the main menu's 'Test Patterns' sub menu:
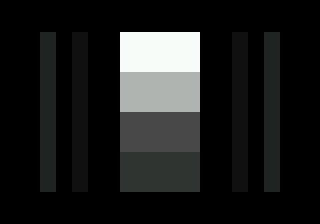
PLUGE
The picture line-up generation equipment (PLUGE) is a test pattern used to adjust the black level and contrast of a video signal.
The pattern in this suite is mainly designed to adjust the black level. The control for setting this on your TV is usualy named "Brightness". White level on CRT monitors can also be easily calibrated with it.
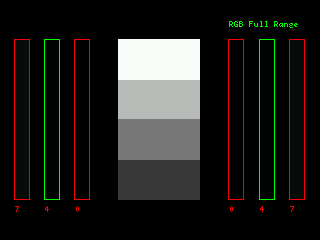
Reduce the Brightness until the bars on the sides of the PLUGE are no longer visible, and then slowly raise it until they are *just* visible. Since every hardware platform has different capabilities when displaying black levels, please check the in suite help for details. In general you can calibrate for NTSC 7.5 IRE setup, or for RGB full range as found in most game consoles. In PAL modes the NTSC 7.5 setups is not shown. In such case, either 2 or 4 IRE patterns are available if the platform supports them. Most versions of the suite have a highlight feature that shows the bars and their values for a short lapse.
For white level adjustment in CRT based displays, raise the contrast until the scanlines in the white are no longer visible, and lower them until they are the same relative size to the rest of the scanlines in the gray bars.
This adjustment ensures that anything intended to be black is actually black, and allows all detail to be seen on dark scenes.
Color Bars
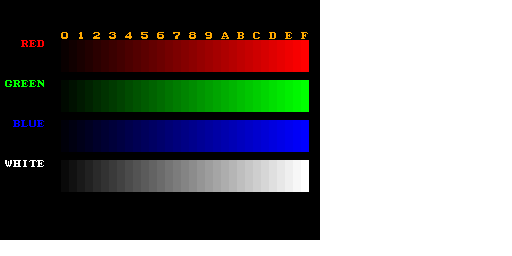
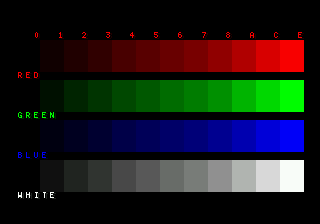
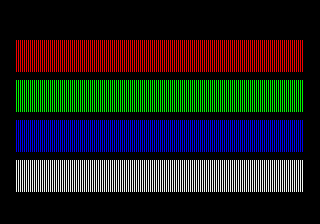
This is a typical pattern for adjusting black, white, and color levels in general. Based on the CPS-2 color adjust pattern. Each bar has been set at a regular interval in hexadecimal, corresponding to colors 0x00 to 0xFF (0 to 255). Displaying all the "pure" colors possible on each system, from lowest to highest intensity.
This is adjusted in the same way black levels are set with the PLUGE. If you adjusted the black level correctly with the PLUGE, the rectangles under the "1" column should be barely visible.
Adjust the white level first, this is done using the "Contrast" control on your TV set. Raise it until you cannot distinguish between the two blocks under the "F", and lower it slowly until you can clearly tell them apart.
The same procedure should be used with each color, raise the control that adjusts the individual color level (not the color/tint one) until you can't tell the two boxes under the "F" from each other, and then lower it until you can distinguish them clearly.
Repeat for each color and you are set.
Genesis/Mega Drive/Sega CD Version
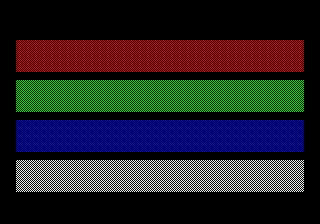
In the case of the Genesis, there is a limitation when trying to display primary colors. While it can display 61 colors simultaneously (4 palettes of 15 colors + alpha each), the palette only has 8 pure tones of Red, Green and Blue. Because of this, the scale can only display 8 tones per color, including the white scale. Nevertheless, using the Shadow/Highlights mode on the VDP it displays 12 shades of each color in this pattern, down to 6% on each pure tone.
SMPTE Color Bars & EBU Color bars
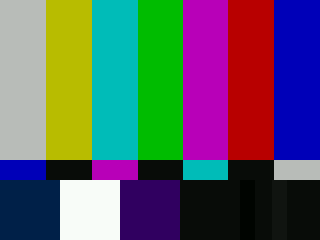
This pattern can be used to calibrate for NTSC levels regarding contrast and brightness, and appropriate colors as well. When in PAL mode, EBU color bars are shown instead since setup starts at 0mV.
You can toggle between 75% and 100% SMPTE levels.
Remember that the black level in the SMPTE pattern refers to 7.5 IRE for video, console games usually start at 0 IRE. This pattern can be used to calibrate colors - or auto calibrated in a professional display - and then black levels can be adjusted with the PLUGE pattern using the Full RGB Mode.
You can use blue filters of the blue only mode of your display if it is available.
In an SMPTE color bar image, the top two-thirds of the television picture contain seven vertical bars of 75% intensity. In order from left to right, the colors are gray, yellow, cyan, green, magenta, red, and blue. This sequence runs through all seven possible combinations that use at least one of the three basic color components of green, red, and blue, with blue cycling on and off between every bar, red cycling on and off every two bars, and green on for the leftmost four bars and off for the rightmost three.
Below the main set of seven bars is a strip of blue, magenta, cyan, and white castellations. When a television receiver is set to filter out all colors except for blue, these castellations, combined with the main set of color bars, are used to properly adjust the color controls; they appear as four solid blue bars, with no visible distinction between the bars and the castellations, if the color controls are properly adjusted.
Color Bars with Gray Scale
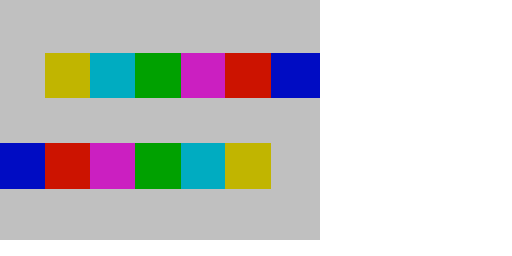
This pattern idea and layout borrows form the Digital Video Essentials color adjust pattern. It has a gray background as reference, and can be used with color filters in order to adjust color accuracy.
Color Bleed Check
This pattern helps diagnose unneeded color up-sampling. It consists of one pixel width color bars alternating with one pixel width black bars.
You can change the vertical bars to a checker board with the A button. The idea for this pattern was provided by Konsolkongen, for use with the DVDO EDGE.
Grid
A grid which borrows its basic pattern from the CPS-2 grid. It is used to determine linearity on CRTs, but is presented here in order to align the screen and find out overscan on the display. It uses the full resolution of the target console, with a margin of red squares for the corners.
Consumer CRTs usually don't allow compensating for overscan, and many games don't draw outside the white square borders. You can measure how many pixels your display is cropping with the overscan test.
Linearity
Five circles are displayed, one in each corner and a big one in the middle. Used on CRTs to check linearity of the display or scaler, in this case you can show or hide the grid. The pattern is designed to work in either NTSC or PAL, respecting the 10:11 pixel and 59:54 pixel aspect ratios. Circles should be perfectly round in the display.
The linearity of the display or upscaler can be verified by measuring the diameter of the circles. Of course the linearity should be kept in all directions.
It is interesting to see how the intensity of the light changes when turning off the grid on some flat panel displays.
Gray Ramp
A gray ramp adjusted to each console color capabilities is displayed. Useful for calibrating white levels and adjusting color temperature.
You should make sure the bars are gray, with no red or blue bias. This can be adjusted with the individual color settings, or the tint control in NTSC displays.
White Screen
As the name implies, the screen is filled with solid white. The user can change the fill color cycling between white, black, red, green and blue. This pattern can be changed to a custom color by pressing the A button while in the white screen, and selecting the desired RGB values.
Pressing A while displaying the black screen and in NTSC modes will toggle between 7.5 IRE and the 0 IRE below black levels in all versions but the Genesis one.
A full white screen usually makes evident audio interference in some RGB cables.
The fully black screen might cause some displays or upscan converters to stop recognizing the signal, which is a common (and undesirable) condition during gameplay.
100 IRE
Displays a 100 IRE pattern, which can be changed in 10 IRE intervals between 0 and 100, or from 100 to 140. The Genesis version has 7 IRE values, which correspond to its palette.
Sharpness
You should set the sharpness of your display to a value that shows clean black and gray transitions, with no white ghosting in between.
On most modern displays, the sharpness control is an edge-enhancement control, and most probably should be set to zero, or in the middle.
In some PVM/BVM displays this is also referred to as aperture.
Overscan
With this pattern you can interactively find out the overscan in pixels and percentage of each edge in a display.
Increment the overscan until you see the white border, then go back one pixel. The resulting number is the amount of overscan in pixels in each direction.
Interactive Tests
Drop Shadow Test
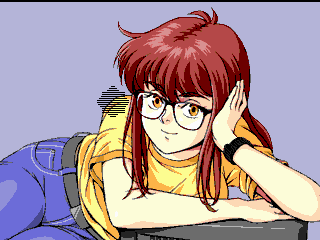
This is a crucial test for 240p upscan converters. It displays a simple sprite shadow (32 by 32 pixels) against a background, but the shadow is shown only on each other frame. On a CRT this achieves a transparency effect, since you are watching a 30hz shadow on a 60hz signal. No background detail should be lost and the shadow should be visible.
This is a very revealing test since it exposes how the device is processing the signal. On devices that can't handle 240p signals, you can usually see that the signal is being interlaced with an odd and an even frame, as if it were regular 480i. This shows a shadow that doesn't flicker, with feathering (a line is drawn and the next one isn't).
The user can toggle the frame used to draw the shadow with the A button on the Genesis or the X button on the Dreamcast. Backgrounds can be switched with the A button and the B button toggles sprites.
Striped Sprite Test
There are actually deinterlacers out there which can display the drop shadows correctly and still interpreted 240p as 480i. With a striped sprite it should be easy to tell if a processor tries to deinterlace (plus interpolate) or not.
The user can change background with the A and B buttons.
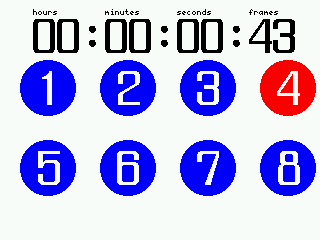
Lag Test
This test is designed to be used with two displays connected at the same time. One being a CRT, or a display with a known lag as reference, and the other the display to test.
Using a camera, a picture should be taken of both screens at the same time. The picture will show the frame discrepancy between them.
The circles in the bottom help determine the frame even when the numbers are blurry.
The Sega Genesis version of the test can be used with a Nomad as the reference display.
Manual Lag Test
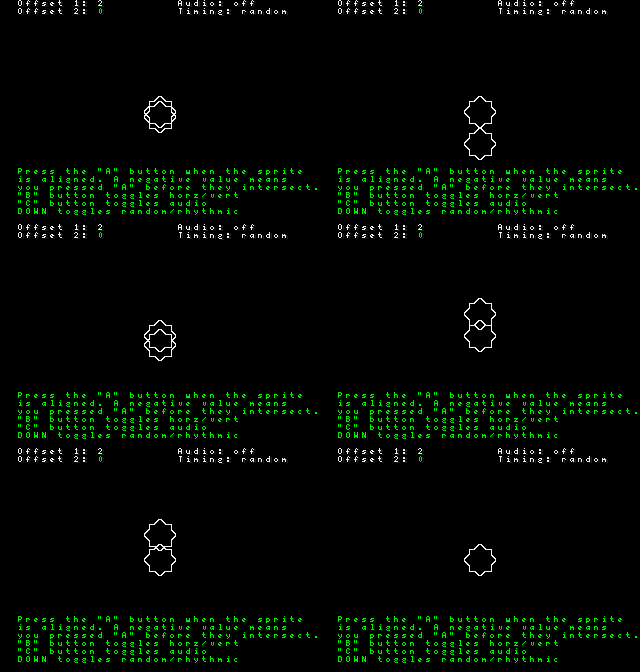
The main intention is to show a changing pattern on the screen, and given a visual and repetitive cue, play a beep alternating speakers. This should show to some degree the lag (if present) when processing the signal.
As an added feature, the user can click the A button when the sprite is aligned with the one on the background, and the offset in frames form the actual intersection will be shown on screen. This can be repeated ten times and the software will calculate the average. Whenever the button was pressed before the actual intersection frame, the result will be ignored (but still shown onscreen).
The B button can be used to change the direction of the sprite from vertical to horizontal, or display both at the same time.
The C button on the Genesis and the X button on the Dreamcast can be used to turn off the audio cue. In the case of the Dreamcast, if a Purupuru (Jump pack) is found, it will be used as well.
Of course the evaluation is dependent on reflexes and/or rhythm more than anything. The visual and audio cues are the more revealing aspects which the user should consider, of course the interactive factor can give an experienced player the hang of the system when testing it via different connections. Since a frame is around 16 ms (1000/60), that value must be considered the general error when using the test results.
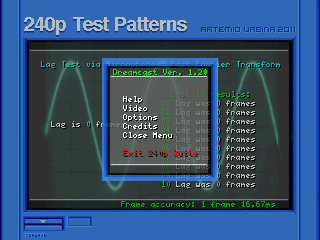
SIP Michrophone and Fast Fourier Transform Lag Test (Dreamcast only)
This test can be used to very accurately measure display lag, if both video and audio follow the same chain.
It uses Fast Fourier Transform (FFT) to detect the audio delay by playing a 1Khz tone and precisely calculating the frame delay.
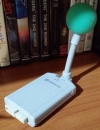
You need a Dreamcast microphone in order to access this test, fortunately they are neither rare nor expensive.
The L and R triggers allow you to change the frame accuracy of the FFT used to estimate the audio delay. This ranges from 1 frame to 1/4th of a frame (16.67ms to 4.16ms, or 20ms to 5ms in PAL).
The smaller the frame accuracy, the higher the probability of small errors; since the Dreamcast's microphone samples rate is 11Khz.
However all settings are within the hardware capabilities.
This test uses the "Fastest Fourier Transform in the West" library for its calculations.
Scroll Test
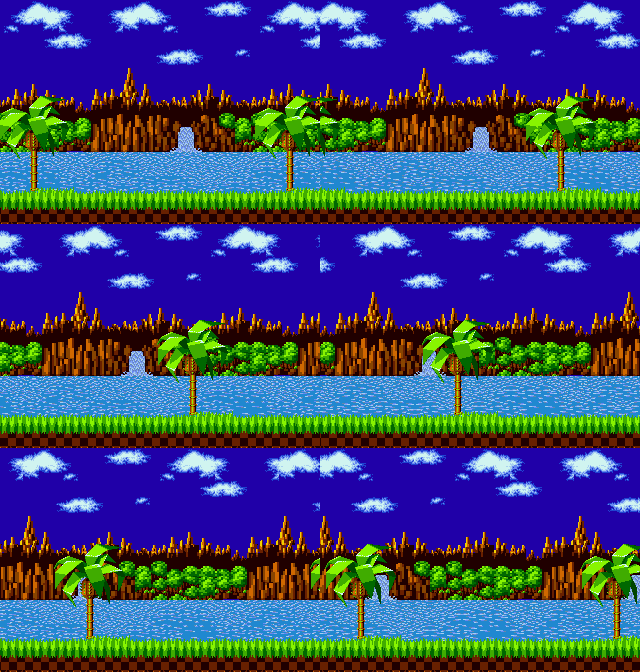
This test shows a two layer background from Sonic the Hedgehog. The speed can be varied with the d-pad, and change direction with the B button. The A button stops the scroll.
Grid Scroll Test
A grid is scrolled vertically or horizontally, which can be used to test linearity of the signal and how well the display copes with scrolling. The C or X buttons can be used to toggle between horizontal and vertical, while the d-pad regulates speed, the A button stops and the B button changes direction.
Horizontal Stripes
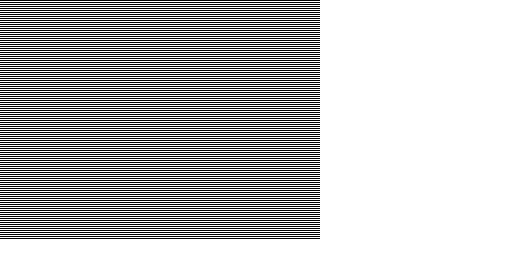
A pattern consisting of a full screen of horizontal black and white stripes, one pixel tall each. This is a taxing pattern, specially when pressing the A button which enables alternating each frame the color of the lines. A good 240p video processor should show all frames. On several displays we've observed that the screen stays static on the first pattern displayed on screen and no change is shown. For this a Frame counter is present, which can be enabled with the C button on Genesis or the X button on Dreamcast.
The user can also change the frames with the B button, which alternates the even and odd frame cadence for the automatic switching of patterns.
When using the 480i resolution on the Dreamcast version, this pattern makes evident the way the upscaler is processing the signal as well.
Checkerboard
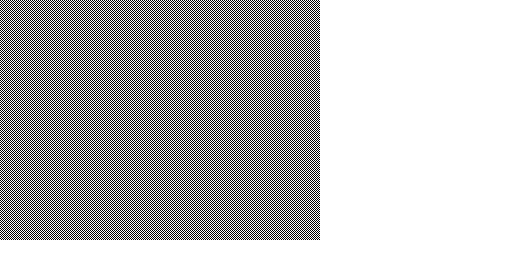
An even more taxing pattern, a one pixel black and one pixel white alternating pattern. Exactly the same commands apply as with the Horizontal Stripes.
This pattern also makes obvious if all lines are being scaled equally, if some appear thicker than other the scaler or display is not displaying them equally.
Backlit Zone Test
This test is designed to evaluate how a display deals with dark scenes. A single sprite of variable size can be controlled by the user on top of a completely black background. The dimming zones can be easily spotted while doing this and the rest of the screen should - in theory - remain off. The sprite can be hidden with "Y" (Dreamcast) or "C" (Genesis), and the sprite size can be changed with "A" and "B".
Sound Test
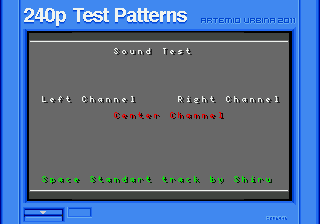
This test allows to play a tone on the left or right audio channels, it also can change the panning of the tone for a central channel (both at the same time). It is meant to test if the stereo cables are connected correctly.
The Genesis version uses a TFM track by Shiru, using the YM synth.
The Genesis Model 1 headphone jack channels are inverted when compared against all the later hardware revisions.
Versions
There are currently five platforms that run the suite, all have been developed and tested on real hardware, The software should run in NTSC mode by default when possible, or if your console is modified. All versions support PAL resolutions and modes when the hardware allows it.
Sega Genesis/Mega Drive
The Sega Genesis version was developed using the SGDK, it was the first version of the 240p Test Suite and is fully coded in C. In order to run it you need a flash cart, we have tested the following:
- Everdrive
- Neomyth 3in1 cart (set the save type to EEPROM).
- Tototek Flashcart
The Genesis resolution is 320x224 and is being used fully, when the VDP is in PAL mode the suite can output 320x240 as well.
It uses a default 3 button layout for compatibility with the basic hardware configuration, but if a 6 button controller is detected the Z button displays contextual help anywhere in the suite. To access this help with a 3 button controller, just enable it form the main menu and it will pop up before each pattern and test.
There is a cartridge version for sale at http://db-electronics.ca/product/240p-test-suite/ for 20 USD, all new parts.
Sega/Mega CD
This is identical to the Genesis version, but loaded from the Sega/Mega CD. In order to run it, you only need a blank CD-R and the appropriate version for the region of your hardware. It is recommended you burn it at 1-4x speed.
In technical terms it uses a slightly different memory map, a Sega CD loader created by Luke Usher and custom boot code to run the SGDK binary.
PC Engine/Turbo Grafx-16
This version of the suite requires a flash cart, such as the Turbo Everdrive. It has support for 224p and 240p, as well as the 3 horizontal resolutions: 256, 320 and 512. It must be noted that most games in 240p really use only 239 lines, so the suite also supports that video mode. It was developed using HuC and ASM.
CD-ROM2/Super CDROM2 (PCE Duo/Turbo Duo)
Both versions have the exact same features as the PC Engine one, and you only need a CD-R. However there are two variants.
The CD-ROM2 version works with Systems that have a 1.0 or 2.0/2.1 System Card, including the American TurboGrafx-16.
The Super CD-ROM2 version uses System Card 3.0 or the Arcade Card. The benefit of this SCD version is that it loads only once at start-up, and everything is ran from RAM afterwards.
Super Nintendo/Super Famicom
The Super Nintendo version was developed using PVSnesLib, it is fully coded in C. In order to run it you need a flash cart, we have tested the following:
The SNES resolution is 256x224, and some patterns and tests are in the rarely used 256x239 mode. It also supports the interlaced mode, which gives a 256x448/256x480 output resolution. The SNES signal in 480i has properly marked even and odd frames, but they are sequential progressive ones encoded in an NTSC signal.
The START button displays contextual help anywhere in the suite.
There is a cartridge version for sale at https://www.retrocircuits.com/product/240p-test-suite/ for 20 USD, all new parts.
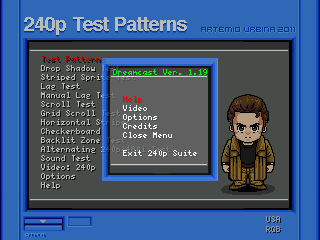
Sega Dreamcast
The Sega Dreamcast version includes more options, but the core functionality for 240p is the same. No special hardware or modifications are needed, it will run on any MIL-CD compatible Dreamcast after burning the CDI image (discjuggler format). It uses the KallistiOS as framework and SDK.
This version has a menu option for changing the current resolution, with the following values:
- 240p: Standard 320x240 at 60hz is used, with all graphic data in that resolution.
- 480i scaled 240p assets (NTSC): This is 640x480i at 60hz, but using all the resources at 320x240 using internal line doubling. Useful for testing for this case which is present in many Dreamcast and PS2 games. Also known as "Fake hi-res"
- 480i mixed 480p/240p assets (1:1/NTSC): It is 640x480i at 60hz as well, however some graphics are unscaled and shown only on the upper left corner of the screen (the first 320x240 pixels). Since there is a 1 to 1 pixel ratio as in 240p, tests can be performed for 480i de-interlacers and scalers. Some test are shown in full 480i, such as the grid and scroll.
- 480p mixed 480p/240p assets (1:1)with scanlines: Only available when using a VGA Box.Scanline intensity can be modified from options.
- 480p scaled 240p assets & scanlines: Only available when using a VGA Box. This is internally line-doubled and displayed. In the case of previous resolutions, they are also internally line doubled to 480p, but respecting each mode variations.
- 288p: The progressive variant of PAL 625i line video, it has 312 lines of which 288 video lines are active. The DC can output 320x264p when in this mode.
- 576i scaled 240p assets (PAL): This displays the 240p patterns in 576i mode. It uses the 480 visible lines, 240 in each field. The whole content of the suite is linedoubled in this mode.
- 576i 480/240p assets (1:1/PAL): It is 576i at 50hz as well, however some graphics are unscaled and shown only on the upper left corner of the screen (the first 320x240 pixels). Since there is a 1 to 1 pixel ratio as in 240p, tests can be performed for 480i de-interlacers and scalers. Some test are shown in 480 resolution, such as the grid and scroll.
PAL modes must be enabled from the Options menu and are only available in 'European Flash ROM' Dreamcasts since other regions output a corrupt PAL signal.
The DC cannot use the whole 288 lines as active video, instead it can draw 264 lines in 288p mode and only 480 lines when in 576i mode. In order to help overcome this limitation, the 240p suite adds several options for evaluation of PAL modes.
PAL consoles output PAL 60 when NTSC modes are selected and a compoiste cable is used, and start at line 23 instead of line 22.
The software is compatible with composite, s-video, RGB-21/SCART and VGA cables.
The Dreamcast resolution is full 320x240 when in that mode and using the PowerVR (PVR) version (however the lowest pixel is not visible in most modes), there is a previous SDL version that runs on 320x234 mode, but the small framework was rewritten to use the PVR chip on the Dreamcast directly with a great advantage in speed for frame alternating patterns. However the SDL version is kept - but no longer maintained - for documentation purposes along with its source code.
Nintendo Wii
The Wii version - just as the Dreamcast one - includes more options, but the core functionality for 240p is the same. No special hardware is needed, but your Wii system must be able to run homebrew. It uses the devKitPPC as framework and SDK, via pure GX calls.
It supports the Wiimote, nunchuck, Wii classic and Gamecube controllers,
In order to install it, copy the 240pSuite folder to the app folder in your SD card, and launch it from the Homebrew channel. You can also use Wiiload via wifi.
This version has a menu option for changing the current resolution, with the following values:
- 240p: Standard 320x240 at 60hz is used, with all graphic data in that resolution.
- 480i scaled 240p assets (NTSC): This is 640x480i at 60hz, but using all the resources at 320x240 using internal line doubling. Useful for testing for this case which is present in many Dreamcast and PS2 games. Also known as "Fake hi-res"
- 480i mixed 480p/240p assets (1:1/NTSC): It is 640x480i at 60hz as well, however some graphics are unscaled and shown only on the upper left corner of the screen (the first 320x240 pixels). Since there is a 1 to 1 pixel ratio as in 240p, tests can be performed for 480i de-interlacers and scalers. Some test are shown in full 480i, such as the grid and scroll.
- 480p mixed 480p/240p assets (1:1)with scanlines: Only available when using a component cable. It must be enabled via the options menu as a precaution for not displaying 480p in a non compatible CRT.
- 480p scaled 240p assets & scanlines: Only available when using a component cable. This is internally line-doubled and displayed. It must be enabled via the options menu as a precaution for not displaying 480p in a non compatible CRT.
- 288p: The progressive variant of PAL 625i line video, it has 312 lines of which 288 video lines are active. The Wii can output 320x264p when in this mode.
- 576i scaled 240p assets (PAL): This displays the 240p patterns in 576i mode. It uses the 480 visible lines, 240 in each field. The whole content of the suite is linedoubled in this mode.
- 576i 480/240p assets (1:1/PAL): It is 576i at 50hz as well, however some graphics are unscaled and shown only on the upper left corner of the screen (the first 320x240 pixels). Since there is a 1 to 1 pixel ratio as in 240p, tests can be performed for 480i de-interlacers and scalers. Some test are shown in 528 resolution, such as the grid and scroll.
In order to help overcome resolution limitations when in PAL modes, the 240p suite adds several options for evaluation of PAL modes. Please check the interactive help for details.
The software is compatible with composite, s-video, SCART and component cables.
Includes libcheckregion
Nintendo GameCube
This is identical to the Wii version in terms of features, but adapted for the GameCube hardware.
NES/Famicom
Damian Yerrick (@PinoBatch) created the NES version of the suite. The Nintendo Entertainment System (NES) can output 240 picture lines in a progressive "double struck" mode. It does not support interlaced video, and its 52-color palette is closer to HSV than RGB.
The 240p test suite for Nintendo Entertainment System was developed in 6502 assembly language using ca65, with image conversion tools written in Python 3 and Pillow (Python Imaging Library). It was tested on authentic NTSC and PAL NES consoles using a PowerPak.
It compensates for differences between NTSC, PAL NES, and PAL famiclone (e.g. Dendy) systems.
You can also burn it to an NES cartridge with an UNROM or BNROM board. Full instructions are in making-carts.md inside the zip file.
Game Boy
Damian Yerrick also created versions of the suite for Game Boy and Game Boy Advance. These are called "144p Test Suite" and "160p Test Suite" respectively because these handhelds' LCD video signals use a horizontal scan significantly slower than the 15.7 kHz of 240p video. These can be used with the Super Game Boy accessory for Super NES or the Game Boy Player accessory for GameCube, which themselves introduce scaler quirks.
The Game Boy version is written in assembly language with RGBDS and a ton of compression. It includes Super Game Boy and Game Boy Color enhanced tests and an MDFourier tone generator yet fits into Catskull's 32 KiB cartridge.
The Game Boy Advance version is written in C and built with devkitARM. It is small enough to fit in RAM and thus compatible with multiboot cables and the GBA Movie Player in addition to conventional flash carts.
These versions extend the "100 IRE" test to "Motion blur", which flickers between two shades of gray at a user-specified rate. This test highlights slow response, STN smearing, and row inversion artifacts of LCDs.
Neo Geo MVS/AES and CD
NeoHomeBrew made a binary only version for all Neo Geo systems, named Neo Geo monitor test tool. It is available at http://www.neohomebrew.com/neo-geo-monitor-test.php
Sega Master System
Created by Sverx using devkitSMS. All info and downloads available at:
http://www.smspower.org/forums/17116-SMSTestSuiteWorkInProgressHomebrew
Playstation
Filip Alác is creating the PS1 version of the suite. PS1 version support 224p/448i, 240p/480i in NTSC and PAL also support 256p/512i mode. Also it support 256 horizontal resolution. PS1 version currently lack of:
- 100 IRE test pattern
It was developed in C with PSXSDK.
Other versions
There is interest in creating versions for other platforms, so far these have been the choices due to having homebrew SDKs. Of course since it is an open source project, contributions are welcome and encouraged.
A Sega Saturn version is being considered.
Source code
The source code is released under the GPL. Homebrew and open source SDKs have been used on the platforms so far. The test pattern images used to generate the graphical data for the console versions are included along with the source code.
The Sega CD loader (c) by Luke Usher/SoullessSentinel and is not under the GPL, used with permission for this project.
The most up-to-date source code repositories:
- Most platforms
- ArtemioUrbina/240pTestSuite on GitHub
- NES, GB, and GBA
- pinobatch/240p-test-mini on GitHub
Downloads
Binaries are available for the Genesis/MegaDrive, Sega/Mega CD, PCE/TG-16/PCE Duo/SCD, SNES/SFC, GameCube, Wii and Sega Dreamcast versions.
In the case of the CD systems all you need is a CD-R and the console, for the cart version you need a flash cart,
Current release is 1.14 on the Genesis/Sega CD, 1.00 on the PC Engine, 1.01 on SNES, 1.20 on Dreamcast and 1.8 on Wii/GC (version numbers are platform specific and have the same relative features) available at the 240p Test Suite files page on SourceForge.
NES, GB, and GBA have mostly synchronized versioning. The latest release is at 240p Test Suite releases on GitHub.
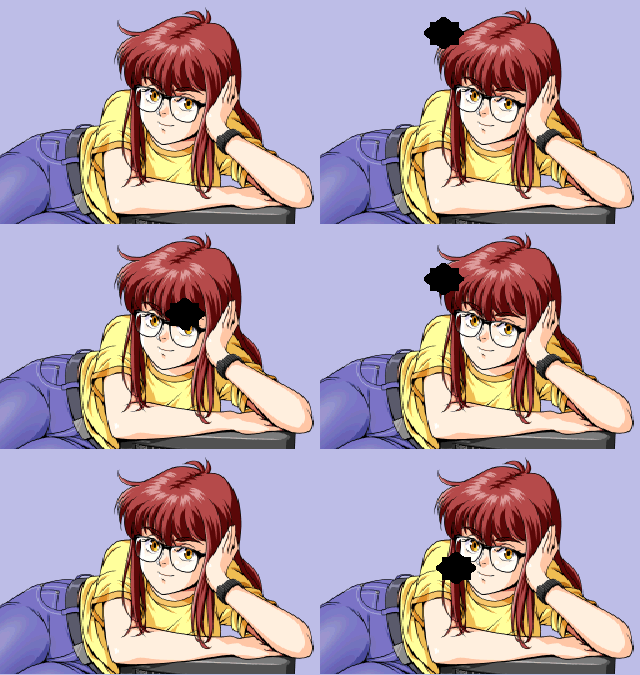
WARNING: Programmer graphics inside
Physical releases
If you can publish the suite in physical form, of course you can do so without a problem. We can also brand it for your physical release.
- The Sega Genesis version is available from http://db-electronics.ca/product/240p-test-suite/ all new parts, and from https://megacatstudios.com/collections/sega-genesis/products/240p-test-suite
- The Super Nintendo version is available from https://www.mortoffgames.com/index.php?route=product/product&product_id=966&search=240p+Test+Suite+for+SNES all new parts
- db-electronics is preparing a PC Engine/TG-16 release
- PCEWorks has the Super CD-ROM2 version available https://pceworks.wordpress.com/availability/
Bug Reports, new features and suggestions
All are welcome at the project page, the discussion page of this wiki or at the Shmups forum.
If you rather use mail, use aurbina -> junkerhq.net
New designs and graphics are welcome as well.
Contributors
- Code and patterns: Artemio Urbina
- Advisor: Fudoh
- Main menu graphics: Asher
- NES Version: Damian Yerrick
- PS1 Version: Filip Alác
- SGDK assistance: Stephane
- Sega CD Loader by: Luke Usher/SoullessSentinel (used with permission)
- Sega CD assistance: Chilly Willy & TascoDLX
- KallistiOS SDK assistance: BlueCrab
- PVSnesLib assistance: Alekmaul
- Color Bleed pattern: Konsolkongen
Information on 240p video and scanlines
Recommended Scalers, Upscan converters and Video Processors
Versión en español
